Go Back   DreamTeamDownloads1, FTP Help, Movies, Bollywood, Applications, etc. & Mature Sex Forum, Rapidshare, Filefactory, Freakshare, Rapidgator, Turbobit, & More MULTI Filehosts > Computer Help Info.& New Technology > How To - (Tips and Tricks) & NEWS

How To - (Tips and Tricks) & NEWS All the Help You Need and Tips & Tricks for your PC & some Humourous Stuff.

IMPORTANT ANNOUNCEMENT
Hallo to All Members. As you can see we regularly Upgrade our Servers, (Sorry for any Downtime during this). We also have added more Forums to help you with many things and for you to enjoy. We now need you to help us to keep this site up and running. This site works at a loss every month and we appeal to you to donate what you can. If you would like to help us, then please just send a message to any Member of Staff for info on how to do this,,,, & Thank You for Being Members of this site.
Post New ThreadClosed Thread
 
LinkBack Thread Tools Display Modes
Old 16-07-11, 17:18   #1
 
Ladybbird's Avatar
 
Join Date: Feb 2011
Posts: 47,595
Thanks: 27,633
Thanked 14,458 Times in 10,262 Posts
Ladybbird has a reputation beyond reputeLadybbird has a reputation beyond reputeLadybbird has a reputation beyond reputeLadybbird has a reputation beyond reputeLadybbird has a reputation beyond reputeLadybbird has a reputation beyond reputeLadybbird has a reputation beyond reputeLadybbird has a reputation beyond reputeLadybbird has a reputation beyond reputeLadybbird has a reputation beyond reputeLadybbird has a reputation beyond repute

Awards Showcase
Best Admin Best Admin Gold Medal Gold Medal 
Total Awards: 8

Default PHOTOSHOP -50+ Tools & Techniques to Remove Image Backgrounds

50+ Tools & Techniques to Remove Image Backgrounds in Photoshop, pt 1


There are probably hundreds of different ways to remove backgrounds in Photoshop, and this guide aims to show you many basic ways to do just that. Get started with the basics here.
Photoshop has so many ways to cut out backgrounds and isolate objects, it sometimes seems like it was the sole purpose the program was created. We’ll attempt to take a crack at as many of those many ways as we can in this multi-part article, detailing 50+ ways backgrounds can be deleted, erased, masked, hidden, and removed. Keep reading!


Unlocking the Background vs Duplicating it


When Photoshop opens an image, it sees it as an unlayered file, and “Locks” the background. Any attempt to erase or delete information will result in dropping back to the “background color” and not to transparancy—what you want when you try to isolate an object, or remove a background.

Double click your Background Layer get the above dialog box and unlock it. That will transform it to a new layer called “Layer 0.” Many Photoshop purists will wag their fingers at you for using this method, as they insist that you can lose the deleted parts of your image forever. If you choose to use this “unlocking” method, make sure you save a copy of your image file under a different name to avoid overwriting any original versions you may need in the future.

To avoid any of said finger wagging, you can Right-Click on your background layer and pick “Duplicate” to create a perfect copy of your background . You can then click the in your layers panel to hide the background layer, leaving it hidden away and intact. Either way will allow you to delete parts of your image to transparency. Both methods are about equal if you work carefully—use whichever one suits you best.


The Basics for Removing Objects, Backgrounds


Most of the time, removing a background involves creating a selection that isolates an object, person, or whatever. Once that selection is created, creating a new layer usually involves some form of Copy-Paste. This seems like an excellent place to begin, considering nearly every technique will involve one of these methods or keyboard shortcuts.


Cut, Copy, Paste: Shortcut Key (Ctrl + X, Ctrl + C, Ctrl + V)
Your basic cut and copy to clipboard functionality dating back through dozens of years of computer programs. Cut and copy are most obvious way to get your isolated selections into new layers.


Copy Merged: Shortcut Key (Ctrl + Shift + C)
This may look like the opposite of isolating objects, but it’s useful nonetheless. If you have a huge pile of layers and a selection that goes over several of them, Copy Merged will combine them into a single layer when you paste.


Paste In Place: Shortcut Key (Ctrl + Shift + V)
Paste has a bad habit of putting your newly copied information wherever it wants, usually in the center of your artboard. This can be annoying, so use Paste in Place to paste your new layer directly on top of where you cut it from.


Paste Into: Shortcut Key (Alt + Ctrl + Shift + V)
If you have a selection, use Paste Into to have Photoshop automatically create a layer mask, trimming what you paste into your selection.


Paste Outside: Shortcut Key (None)
The same basic idea as Paste Into, except in reverse. Paste Outside automatically creates a mask using whatever current selection you have as it pastes the image on your clipboard.


Layer via Copy, Layer via Cut: Shortcut Key (Ctrl + J, Ctrl + Shift + J)
For Photoshop users that can’t be bothered to press commands for Copy and Paste, there’s Layer via Copy and Layer via Cut. In one quick motion, a Ctrl + J or Ctrl + Shift + J will copy your selection, and do a Paste in Place, aligning your new layer directly from where you copied it from.

continued,,,,
__________________
PUTIN TRUMP & Netanyahu Will Meet in HELL


..................SHARKS are Closing in on TRUMP..........................


TRUMP WARNS; 'There'll Be a Bloodbath If I Don't Get Elected'..MAGA - MyAssGotArrested...IT's COMING


PLEASE HELP THIS SITE..Click DONATE
& Thanks to ALL Members of ... 1..

THIS SITE IS MORE THAN JUST WAREZ...& TO STOP SPAM-IF YOU WANT TO POST, YOUR FIRST POST MUST BE IN WELCOMES
Ladybbird is online now  
Digg this Post!Add Post to del.icio.usBookmark Post in TechnoratiTweet this Post!
Old 16-07-11, 17:24   #2
 
Ladybbird's Avatar
 
Join Date: Feb 2011
Posts: 47,595
Thanks: 27,633
Thanked 14,458 Times in 10,262 Posts
Ladybbird has a reputation beyond reputeLadybbird has a reputation beyond reputeLadybbird has a reputation beyond reputeLadybbird has a reputation beyond reputeLadybbird has a reputation beyond reputeLadybbird has a reputation beyond reputeLadybbird has a reputation beyond reputeLadybbird has a reputation beyond reputeLadybbird has a reputation beyond reputeLadybbird has a reputation beyond reputeLadybbird has a reputation beyond repute

Awards Showcase
Best Admin Best Admin Gold Medal Gold Medal 
Total Awards: 8

Default Re: PHOTOSHOP -50+ Tools & Techniques to Remove Image Backgrounds

conclusion part 1.....


Working With Selection Tools


It’s simple to create complicated selections with the basic marquee and selection tools. Here are some basic keyboard shortcuts that can help you unlock some hidden power of selections by adding, subtracting and intersecting.


Add Selection
: Shortcut Key (Shift)
With any selection tool active (see below) hold down shift when creating new selections to add them to the current selection.


Subtract Selection: Shortcut Key (Alt)
When using a selection tool, hold Alt to subtract any newly created selection from the existing one, creating holes in selections, or allowing you to edit out mistakes.


Intersect Selection: Shortcut Key (Shift + Alt)
Combines two selections to pick what they have in common. With an existing selection, hold Shift and Alt, and draw a selection in your image. The pixels in common will be picked.


Load Selection: Shortcut Key (Ctrl + Click Layer, Ctrl + Click Channel)
Holding Ctrl and clicking the thumbnail in a layer or channel will load the opaque pixels in said layer or channel. Load selection also works with Add, Subtract, and Intersect, allowing for incredibly precise selections.


Basic Selection Tools in Your Toolbox


Now that we’ve covered the hidden features of the selection tools, we can take a look at the various selection tools we find in our toolbox, and some of the uses therein.


Rectangular Marquee:
Shortcut Key (M)

Use the rectangular marquee to draw the “marching ants” selection around any roughly square areas, and create new layers or masks with your new selection.Hold down Shift and Click + Drag to draw squares. Also try: Add Selection, Subtract Selection, and Intersect Selection with this tool.


Elliptical Marquee
: Shortcut Key (Shift + M)

Picking the Elliptical Marquee will allow you to draw selections around your circular and elliptical shaped areas you want to isolate or mask.Hold down Shift and Click + Drag to draw perfect circles. Also try: Add Selection, Subtract Selection, and Intersect Selection with this tool.


Lasso:
Shortcut Key (L)

Select the lasso to draw freeform lines around your object, in any shape you can mouse or draw with your stylus. Once selected, copy to a new layer or use masks to block off the unwanted areas in your layer.Hold down Alt and release the mouse button to quickly switch to the Polygonal Lasso. Also try: Add Selection, Subtract Selection, and Intersect Selection with this tool.


Polygonal Lasso
: Shortcut Key (Shift + L)

The Polygonal Lasso allows you to draw straight lines between points you create with clicks of your mouse. An excellent way to draw precise angular selections quickly, without the pain of clicking and dragging.Hold down Alt and release the mouse button to quickly switch to the regular Lasso Tool. Also try: Add Selection, Subtract Selection, and Intersect Selection with this tool.


Magnetic Lasso
: Shortcut Key (Shift + L)

The Magnetic Lasso uses Photoshop’s edge detect to snap to the edges of objects. In cases where the edges are clear to the program, this is a decent way to isolate an object. Often, it offers a rough, somewhat poor selection.Hold down Alt to quickly switch to either the regular lasso or the Polygonal Lasso in this mode. Also try: Add Selection, Subtract Selection, and Intersect Selection with this tool.


Magic Wand: Shortcut Key (W)

Working similar to the Bucket Fill, the magic wand creates a selection of touching, adjacent similar colors.In the options panel, deselect “contiguous” to find all similar colors in the entire document, regardless of whether they touch or not. Also try: Add Selection, Subtract Selection, and Intersect Selection with this tool.


Quick Selection Tool
: Shortcut Key (Shift + W)

Another rough edge-detecting tool, Quick Selection will provide a basic outline when the program can easily find edges. Depending on how you “paint” with Quick Selection, Photoshop may find more or less of your object.Also try: Add Selection, Subtract Selection, and Intersect Selection with this tool.
Combinations of these tools and techniques already offer users a wide range of easy, precise, and serviceable ways to remove backgrounds and isolate objects. However, Photoshop still has perhaps hundreds of ways to remove backgrounds—many of which we’ll cover, starting in part 2 of “50+ Ways to Remove Image Backgrounds.”

Image Credits: Bald eagle

Many thanks to Geek Eric Z Goodnight for this

Enjoy and dont forget the thanks


.
__________________
PUTIN TRUMP & Netanyahu Will Meet in HELL


..................SHARKS are Closing in on TRUMP..........................


TRUMP WARNS; 'There'll Be a Bloodbath If I Don't Get Elected'..MAGA - MyAssGotArrested...IT's COMING


PLEASE HELP THIS SITE..Click DONATE
& Thanks to ALL Members of ... 1..

THIS SITE IS MORE THAN JUST WAREZ...& TO STOP SPAM-IF YOU WANT TO POST, YOUR FIRST POST MUST BE IN WELCOMES
Ladybbird is online now  
Digg this Post!Add Post to del.icio.usBookmark Post in TechnoratiTweet this Post!
The Following User Says Thank You to Ladybbird For This Useful Post:
Old 16-07-11, 18:17   #3
 
Ladybbird's Avatar
 
Join Date: Feb 2011
Posts: 47,595
Thanks: 27,633
Thanked 14,458 Times in 10,262 Posts
Ladybbird has a reputation beyond reputeLadybbird has a reputation beyond reputeLadybbird has a reputation beyond reputeLadybbird has a reputation beyond reputeLadybbird has a reputation beyond reputeLadybbird has a reputation beyond reputeLadybbird has a reputation beyond reputeLadybbird has a reputation beyond reputeLadybbird has a reputation beyond reputeLadybbird has a reputation beyond reputeLadybbird has a reputation beyond repute

Awards Showcase
Best Admin Best Admin Gold Medal Gold Medal 
Total Awards: 8

Default Re: PHOTOSHOP -50+ Tools & Techniques to Remove Image Backgrounds

50+ Tools & Techniques to Remove Image Backgrounds in Photoshop, pt 2


Last week we said there were hundreds of ways to remove backgrounds in Photoshop, and now we’re diving deeper into that claim. Keep reading for the next huge installment of ways to remove backgrounds in Photoshop!
Today, we’ll cover masking images, and why some people prefer masking to erasing big chunks of your images, as well as a bunch of basic (and some not so basic) ways to remove all those image backgrounds using masks image erasing methods.


Masking Images, Deleting Them… What’s the Difference?


Last week, we covered the difference between unlocking an image background and duplicating it. Now, let’s take a look at the differences between masking and deleting, which aren’t apparent when you simply look at the images themselves.


Layer Masks, which you can read more about here;


http://www.dreamteamdownloads.com/how-tips-tricks-computer-fun/89457-how-use-layer-masks-vector-masks-remove-complex-backgrounds-photoshop.html#post107693


,,, are a simple way to hide information in layers while keeping maximum editability. Many professional Photoshop users often find a number of reasons they need to that hidden information, and Layer Masks allow them to keep it, while still hiding it away.


Create a layer mask by clicking the icon in the Layers Panel when you have a selection with the marquee, or any of the advanced methods located below. If your mask blocks off the wrong area, you can select the mask and press Ctrl + I to invert it, and switch the transparent and opaque areas. Layer Masks require unlocked layers, like the copy of the background layer above, or the “Layer 0” unlocked version of the Background located directly below. Refer to Part 1 below in this thread


There is, however, something to be said for deleting image information when cutting out background, some of which is not terribly useful to keep around. Many of Photoshop’s background erasing tools only work with the “image deletion method,” so it’s obvious to see there’s no right and wrong way sanctioned by Adobe. We’ll leave it up to the discretion of the reader which method suits them best, because Photoshop is all about the user’s options. Simply keep in mind that deleted information will never come back once it is deleted unless you can revert to an older version of your file.
Erasing or deleting image information can be done on any layer that is unlocked, like the unlocked Layer 0 above, or the duplicated Background copy layer shown in the last example.


Methods to Delete Image Information


Eraser: Shortcut Key (E)

The eraser works in manner similar to the brush tool and is simple enough to grasp and understand. Unlock your background layer like we showed you last week, and simply paint out the background information you don’t want to use. Many Photoshop users do not like using the Eraser tool to remove backgrounds, as it can be time consuming to accurately cut out an image, particularly for users that struggle to paint accurate marks with the mouse.
The eraser is one of the most basic tools to remove backgrounds, and should be used as little as possible, if you can manage. Still, HTG has previously covered a more in depth how-to on the eraser tool.


Magic Eraser Tool
: Shortcut Key (Shift + E)

Buried beneath the ordinary eraser tool, you’ll find the simple-as-can-be Magic Eraser Tool. This tool is sort of like a Paint Bucket Tool that only fills transparency. There are lots of settings and methods to play around with the sensitivity of the Magic Eraser, allowing for lots of different results. One of the great benefits for new Photoshop users is that this tool actually will unlock background layers in a single step—simply click in a contiguous field of a single color in your “Background” layer, and watch it disappear to transparency.

A more complete how to on the Magic Eraser Tool can be found here;


http://www.dreamteamdownloads.com/how-tips-tricks-computer-fun/89495-quickly-remove-backgrounds-photoshop-using-magic-eraser.html#post107734


Background Eraser Tool:
Shortcut Key (Shift + 3)

While this tool might seem like the holy grail of Photoshop tools, you’ll likely be let down when you put the Background Eraser Tool into actual practice. Using Photoshop’s edge detection, the Background Eraser tool is far from perfect. There are three settings: Contiguous, Non-Contiguous, and Edge-Detect. Frankly, all three have their inaccuracies, although one may have an advantage over others in certain situations.
This tool is far from the best method on this list to remove a background. Experiment with it, but don’t expect to get a lot of use out of it.


Paint Bucket (painting transparancy)
: Shortcut Key (G)

For some bizarre reason, Adobe has seen fit to give Photoshop users two tools with nearly identical functions. The Paint Bucket Tool has a setting that allows it to paint transparency,making the only difference that the Magic Eraser will unlock and paint to transparancy in one single step, and this tool will not even work unless the layer is unlocked. You can find the setting for “Clear” in the top options.


continued,,,,,,
__________________
PUTIN TRUMP & Netanyahu Will Meet in HELL


..................SHARKS are Closing in on TRUMP..........................


TRUMP WARNS; 'There'll Be a Bloodbath If I Don't Get Elected'..MAGA - MyAssGotArrested...IT's COMING


PLEASE HELP THIS SITE..Click DONATE
& Thanks to ALL Members of ... 1..

THIS SITE IS MORE THAN JUST WAREZ...& TO STOP SPAM-IF YOU WANT TO POST, YOUR FIRST POST MUST BE IN WELCOMES
Ladybbird is online now  
Digg this Post!Add Post to del.icio.usBookmark Post in TechnoratiTweet this Post!
The Following User Says Thank You to Ladybbird For This Useful Post:
Old 16-07-11, 18:19   #4
 
Ladybbird's Avatar
 
Join Date: Feb 2011
Posts: 47,595
Thanks: 27,633
Thanked 14,458 Times in 10,262 Posts
Ladybbird has a reputation beyond reputeLadybbird has a reputation beyond reputeLadybbird has a reputation beyond reputeLadybbird has a reputation beyond reputeLadybbird has a reputation beyond reputeLadybbird has a reputation beyond reputeLadybbird has a reputation beyond reputeLadybbird has a reputation beyond reputeLadybbird has a reputation beyond reputeLadybbird has a reputation beyond reputeLadybbird has a reputation beyond repute

Awards Showcase
Best Admin Best Admin Gold Medal Gold Medal 
Total Awards: 8

Default Re: PHOTOSHOP -50+ Tools & Techniques to Remove Image Backgrounds

conclusion....


Non-Contiguous Paint/Magic Eraser


Both the Paint Bucket Tool and the Magic Eraser have a special setting called “Contiguous.” Leaving this setting on means your fill will go to work on all enclosed shapes of that particular color. Turning it off will erase every instance of that color in that layer in the entire image. In cases where skies and random bits of backgrounds end up in enclosed parts of the image, this can be helpful, as it grabs all of it at once, reducing it to transparancy.
It doesn’t discriminate between the parts of the image you want and those that you don’t, so use with care and be prepared to with a quick Ctrl + Z to undo goof ups.


Delete
: Shortcut Key (Backspace, Delete)

With a selection loaded on an unlocked layer, a simple press of the Delete or Backspace key can knock a layer down to transparency. It doesn’t get any simpler thanthat!


Fill: Shortcut Key (Shift + F5)

A much under-utilized tool, the Edit > Fill tool is the superpowered version of the Paint Bucket Tool that works independent of the cursor. A quick tap of Shift + F5 will bring up the Fill dialog box, where you can fill all selected areas with preselected sets of colors, or simply fill said areas with transparancy.
Because the Fill command is independent of the cursor tool, there is no way to control which colors will be knocked back to transparency, so make certain your selections are the way you want them before using the Fill tool.
To knock back to transparency using this tool, set your “Blending Mode” to clear, as shown on the right.


Advanced Methods for Creating Masks


Quick Mask Mode:
Shortcut Key (Q)

Press Q to jump to Photoshop’s Quick Mask mode, which allows you to create masks using the paintbrushes and buckets. The mask color is automatically transparent red, marking the color you’re masking out, or removing. In Quick Mask mode, you can use the Brush Tool, Pencil Tool, or Paint Bucket Tool to paint in solid colors. Since you’re technically working with a mask, you can only work with shades of gray, preferably black and white.
In Quick Mask Mode, painting black represents masked or “erased” areas, while painting white represents your image areas.

Press Q again
to end quick mask mode, which will automatically create a selection from your painting.


Pen Tool
: Shortcut Key (P)

The pen tool is the go-to solution for many photo professionals that want to isolate an object quickly and easily. While the pen tool is notoriously difficult to master, skilled pen tool users can cut quite accurate selections in short periods of time. Using the pen tool, draw a vector shape around your object or objects. This can be tricky, as the pen tool is difficult. Once you finish your enclosed shape, you’ll need to find your Paths panel to load your selection.
You’re looking for the button that looks like a Photoshop marquee that creates a selection for this path.


Vector Masks with the Pen Tool
:

You can also create a Vector mask from any path you’ve drawn. Instead of creating a raster selection from your vector drawing, you can navigate to Layer > Vector Mask > Current Path to automatically create a mask from your currently loaded path in your Paths panel. Vector Masks have the advantage of being scalable, and keeping edges clean even when artwork is blown up to large sizes. Beyond that, there’s little advantage of vector masks over Layer Masks, as vector masks seem to render masked images in a near-identical manner to raster-based Layer Masks.
Simply use whichever mask style suits you best.


Freeform Pen Tool
: Shortcut Key (Shift + P)

For those of us that dislike using the pen tool, but like the advantages of vectors, there’s the Freeform Pen Tool. This tool allows you to draw line segments in the same freeform manner the Lasso tool allows. Simply click and drag to create vector paths to become selections or vector masks, exactly like the previous techniques.
If you find you have broken line segments, you can simply switch to the Pen Tool to join them.


Vector Mask from Type Tool


One of the fun things about Photoshop, is that there’s rarely one single way to do things. In the case of vector masks, they’re not limited to paths drawn by the pen tool. Typography can also be used as a mask with this trick. Create some type of any size or typeface. Right click on your text and find “Create Work Path.” Photoshop creates vector lines around your text.

From there you can return to Layer > Vector Mask > Current Layer to create a mask from your typography.

Like last week’s how-tos, these techniques aren’t necessarily independent of each other—the beauty of Photoshop is the creative combination of all of these techniques to create interesting, easy, and fun ways to accomplish your image goals. Check us out next time, where we’ll take on Part 3 of “50+ Ways to Remove Image Backgrounds.”
Eric Goodnight

.
__________________
PUTIN TRUMP & Netanyahu Will Meet in HELL


..................SHARKS are Closing in on TRUMP..........................


TRUMP WARNS; 'There'll Be a Bloodbath If I Don't Get Elected'..MAGA - MyAssGotArrested...IT's COMING


PLEASE HELP THIS SITE..Click DONATE
& Thanks to ALL Members of ... 1..

THIS SITE IS MORE THAN JUST WAREZ...& TO STOP SPAM-IF YOU WANT TO POST, YOUR FIRST POST MUST BE IN WELCOMES
Ladybbird is online now  
Digg this Post!Add Post to del.icio.usBookmark Post in TechnoratiTweet this Post!
The Following User Says Thank You to Ladybbird For This Useful Post:
Old 16-07-11, 18:33   #5
 
Ladybbird's Avatar
 
Join Date: Feb 2011
Posts: 47,595
Thanks: 27,633
Thanked 14,458 Times in 10,262 Posts
Ladybbird has a reputation beyond reputeLadybbird has a reputation beyond reputeLadybbird has a reputation beyond reputeLadybbird has a reputation beyond reputeLadybbird has a reputation beyond reputeLadybbird has a reputation beyond reputeLadybbird has a reputation beyond reputeLadybbird has a reputation beyond reputeLadybbird has a reputation beyond reputeLadybbird has a reputation beyond reputeLadybbird has a reputation beyond repute

Awards Showcase
Best Admin Best Admin Gold Medal Gold Medal 
Total Awards: 8

Default Re: PHOTOSHOP -50+ Tools & Techniques to Remove Image Backgrounds

Guys, there are literally hundreds of tutorials on background removal using GIMP. GIMP-tutorials.net, gimptalk.com and gimper.net, are 3 great sites for this. Just too many for me to post, with all the extra tuition threads I had to make (links within this thread) to complete this tutorial, it tooks me over two hours to complete it, so to continue your learning process you can check out those sites named above.

AND,,,,, a few $$$ would be gratefully received to help us pay the server and site costs each month,,,pleaseeeeeeeeeeeee
__________________
PUTIN TRUMP & Netanyahu Will Meet in HELL


..................SHARKS are Closing in on TRUMP..........................


TRUMP WARNS; 'There'll Be a Bloodbath If I Don't Get Elected'..MAGA - MyAssGotArrested...IT's COMING


PLEASE HELP THIS SITE..Click DONATE
& Thanks to ALL Members of ... 1..

THIS SITE IS MORE THAN JUST WAREZ...& TO STOP SPAM-IF YOU WANT TO POST, YOUR FIRST POST MUST BE IN WELCOMES
Ladybbird is online now  
Digg this Post!Add Post to del.icio.usBookmark Post in TechnoratiTweet this Post!
The Following User Says Thank You to Ladybbird For This Useful Post:
Old 16-07-11, 19:08   #6
NobodyRogers
Guest
 
Posts: n/a
Default Re: PHOTOSHOP -50+ Tools & Techniques to Remove Image Backgrounds

This is an awesome thread Lady.

Hard work and very impressive. Thanks very much.

Love the Bird themes too, (who knew? )
 
Digg this Post!Add Post to del.icio.usBookmark Post in TechnoratiTweet this Post!
Old 16-07-11, 22:08   #7
 
Ladybbird's Avatar
 
Join Date: Feb 2011
Posts: 47,595
Thanks: 27,633
Thanked 14,458 Times in 10,262 Posts
Ladybbird has a reputation beyond reputeLadybbird has a reputation beyond reputeLadybbird has a reputation beyond reputeLadybbird has a reputation beyond reputeLadybbird has a reputation beyond reputeLadybbird has a reputation beyond reputeLadybbird has a reputation beyond reputeLadybbird has a reputation beyond reputeLadybbird has a reputation beyond reputeLadybbird has a reputation beyond reputeLadybbird has a reputation beyond repute

Awards Showcase
Best Admin Best Admin Gold Medal Gold Medal 
Total Awards: 8

Default Re: PHOTOSHOP -50+ Tools & Techniques to Remove Image Backgrounds

funneeeeeeeeeeeeeeeee

Took me hours to do it and do all the new related threads
within,,, and u only notice the birds???

Hope the member that requested the help appreciates it, but there is a lot more when I have time
__________________
PUTIN TRUMP & Netanyahu Will Meet in HELL


..................SHARKS are Closing in on TRUMP..........................


TRUMP WARNS; 'There'll Be a Bloodbath If I Don't Get Elected'..MAGA - MyAssGotArrested...IT's COMING


PLEASE HELP THIS SITE..Click DONATE
& Thanks to ALL Members of ... 1..

THIS SITE IS MORE THAN JUST WAREZ...& TO STOP SPAM-IF YOU WANT TO POST, YOUR FIRST POST MUST BE IN WELCOMES
Ladybbird is online now  
Digg this Post!Add Post to del.icio.usBookmark Post in TechnoratiTweet this Post!
The Following User Says Thank You to Ladybbird For This Useful Post:
Old 16-07-11, 22:11   #8
NobodyRogers
Guest
 
Posts: n/a
Default Re: PHOTOSHOP -50+ Tools & Techniques to Remove Image Backgrounds

Quote:
Originally Posted by Ladybbird View Post
funneeeeeeeeeeeeeeeee

Took me hours to do it and do all the new related threads
within,,, and u only notice the birds???

Hope the member that requested the help appreciates it, but there is a lot more when I have time
he wrote:
Quote:
This is an awesome thread Lady.

Hard work and very impressive
 
Digg this Post!Add Post to del.icio.usBookmark Post in TechnoratiTweet this Post!
Old 22-08-11, 23:28   #9
 
Ladybbird's Avatar
 
Join Date: Feb 2011
Posts: 47,595
Thanks: 27,633
Thanked 14,458 Times in 10,262 Posts
Ladybbird has a reputation beyond reputeLadybbird has a reputation beyond reputeLadybbird has a reputation beyond reputeLadybbird has a reputation beyond reputeLadybbird has a reputation beyond reputeLadybbird has a reputation beyond reputeLadybbird has a reputation beyond reputeLadybbird has a reputation beyond reputeLadybbird has a reputation beyond reputeLadybbird has a reputation beyond reputeLadybbird has a reputation beyond repute

Awards Showcase
Best Admin Best Admin Gold Medal Gold Medal 
Total Awards: 8

The Best HTG Photoshop Effects in One Free Download: Action Pack #1 HTG action pack


We’ve covered the manual methods of some fun Photoshop effects—now here’s they are in automatic.

Download this Photoshop Action Pack, and get those effects in seconds with the touch of a button.
While there’s a lot of learning and satisfaction that goes into doing something the long way, sometimes the easy way is best. Why go through all the steps when you simply want to apply an effect to 50 of your photographs? Get ready to download, install, and use a great set of actions.


Download the Action Pack


Available on the author’s site, the first HTG Photoshop Action Pack is available for download. The link is safe for work, although the rest of the site has NSFW content. Browse around at your own risk!


Install the HTG Action Pack in Photoshop


In order to use these Photoshop actions, you’re going to need a version of Photoshop, preferably from Creative Suite 1 until the current version, CS5. With the action installed, you can click and run the action on any nearly photo or graphic you choose to use.

Confused about Photoshop actions? We have covered how to here;


Custom Photoshop


What’s in The Action Pack?


Instant Red/Cyan 3D Effect


We recently learned how to make 3D images out of regular RGB graphics, and this action makes it easy to transform your image into a Red/Cyan 3D image in a second.

Check it out here;


3D Images


Instant Pencil Sketch Effect


There are a lot of ways to use photography to create a faux “pencil sketch” look, and now you can do it automatically, without even using our how to.

Check out this thread for help on this;

PENCIL DRAWINGS


Instant Isolated Color Effect (2 Effects)


A classic look from photography and advertising, the action pack includes two versions of the isolated color effect. The first isolates pure red, the second isolates whatever color you have in your foreground color swatch.

Check out the original to see how it’s done on our thread here;

Beginner Photoshop


Instant Pixel Art in Authentic Color Effect (3 Effects)


Lovers of pixel art rejoice! The action pack has three actions that automatically will convert your photo into pixel art using authentic NES, Gameboy, and Sega Master System colors. Take a trip down memory lane and see how it was done.

Check our Thread on it here;

8 Bit Style Graphics


Instant Quick and Dirty Vintage Effect


Last, but not least, we have a HTG classic, a quick and dirty vintage photo effect. This effect will create a hazy sepia toned image with a subtle faux reticulation effect on your images. And if you want to see how that’s done,

Check out the original article on our Thread Here;

Quick and Dirty Vintage Photo Effect


Download all effects in theIf you appreciate all the work that went into this thread please help us to pay the bills to keep this site up and running
__________________
PUTIN TRUMP & Netanyahu Will Meet in HELL


..................SHARKS are Closing in on TRUMP..........................


TRUMP WARNS; 'There'll Be a Bloodbath If I Don't Get Elected'..MAGA - MyAssGotArrested...IT's COMING


PLEASE HELP THIS SITE..Click DONATE
& Thanks to ALL Members of ... 1..

THIS SITE IS MORE THAN JUST WAREZ...& TO STOP SPAM-IF YOU WANT TO POST, YOUR FIRST POST MUST BE IN WELCOMES
Ladybbird is online now  
Digg this Post!Add Post to del.icio.usBookmark Post in TechnoratiTweet this Post!
Old 25-11-11, 22:56   #10
 
Ladybbird's Avatar
 
Join Date: Feb 2011
Posts: 47,595
Thanks: 27,633
Thanked 14,458 Times in 10,262 Posts
Ladybbird has a reputation beyond reputeLadybbird has a reputation beyond reputeLadybbird has a reputation beyond reputeLadybbird has a reputation beyond reputeLadybbird has a reputation beyond reputeLadybbird has a reputation beyond reputeLadybbird has a reputation beyond reputeLadybbird has a reputation beyond reputeLadybbird has a reputation beyond reputeLadybbird has a reputation beyond reputeLadybbird has a reputation beyond repute

Awards Showcase
Best Admin Best Admin Gold Medal Gold Medal 
Total Awards: 8

Default 30 Great Photoshop Tips and Tricks to Help You

30 Great Photoshop Tips and Tricks to Help Your Computer Graphic Skills

Geek Lori Kaufman


Photoshop is a powerful, but complex, graphics program that can be difficult to learn and frustrating to use. We have published many articles about tips and tricks for using Photoshop and how to fix annoying issues you may encounter.

This article compiles 30 of the best tips and tricks we have documented to help you get the most out of Photoshop.

10 Common Photoshop Frustrations (and How to Fix Them in Five Minutes)


Do your cursor or panels in Photoshop keep disappearing? Are your important image files no longer associated with Photoshop? Have you lost control over the automatic “Smart Quotes?” You may have encounter these frustrating issues and can’t figure out how to fix them. The following article lists 10 of the most common Photoshop frustrations and simple solutions to fix them.


Photoshop is not always the most user friendly of programs. Sometimes it has frustrating issues, and the solution is not always clear. Here’s a list of 10 annoying problems you might have with Photoshop, and simple solutions to fix them.
They’ll range from simple to complex, some dealing with why the program won’t let you use your cursor tools, or why your cursor has changed shape. Read on to see the list, and what you can learn to make your graphics editing experience more pleasant and productive.


Your Cursor Disappears or Changes Shape


The Problem: After working with some type or some other tool, only to return to the brush to find that your cursor has changed shape, and is difficult to see. What the heck has happened?


The Solution: If your cursor looks like the ones directly above, you’ve probably switched to “precise cursors.” A simple press of the Caps Lock key will return them to normal. You can also change them under your preferences, shortcut key Ctrl + K.


Your Panels Keep Disappearing


The Problem: Uncertain what you’ve done, all your panels have vanished from your screen. The menu is still available, but what has caused them all to go away?


The Solution: Normally, all panels are hidden by a quick press of the Tab key, often by accident. A single press hides all active panels, and a second one brings them back as they were, no need to reactivate them under the Window menu.


Your Brush Tool (Or Others) Have Stopped Working


The Problem: You’re trying to paint, erase, clone stamp, heal brush, etc, and Photoshop simply won’t make a mark on your canvas or let you use your tools like normal.


The Solution: This can be one of several problems. Go to Select > Deselect if you have an area selected with the marquee tool that you might have forgotten or can’t see. From there, Navigate to your channels panel, and check that you’re not working in a quick mask channel, or any other extraneous channel. If you are, click the combined RGB channel (pictured above, center) or the combined CMYK channel, if you happen to be working in CMYK. You should also be able to see if you are in a mask channel, another potential pitfall.
If you are working in Quickmask mode (pictured above right) you can press shortcut key Q to return to normal, or simply click the icon in your toolbox.


Clipboard Export Error When Switching Programs


The Problem: Photoshop hangs up every time you try to switch programs, and often gives you a strange error about the clipboard.


The Solution: Press shortcut key Ctrl + K to bring up your preferences and under General, you’ll find “Export Clipboard.” This will stop you from copy-pasting image data from Photoshop, but not into Photoshop.


Documents and New Files Always Open In Tabs


The Problem: You’ve migrated to a new version of Photoshop, except you are forced to use the tabs feature whenever you open a document or create a new one.


The Solution: Visit Preferences by pressing shortcut key Ctrl + K. Navigate to “Interface,” where tabs can be disabled for newly opened documents, illustrated above. To put an image into a tab, simply drag it to the snap area at the top of the program, directly under the topmost options panel and menu.


Important Image Files Aren’t Associated With Photoshop


The Problem: You double click a file you expect to open with Photoshop, and a program that has installed and taken over that file association.


The Solution: Right Click the file in Windows Explorer, or any file of a similar type. Find “Open With,” then pick “Choose default program.”


From there, you can associate the file (and subsequent filetype) with Photoshop, and instruct Windows to always use that program for that type of file.


No Control Over Automatic “Smart Quotes”


The Problem: You prefer, for various reasons, to use the “Straight Quotes” versus the curly “Smart Quotes,” but have no control over how to make them.


The Solution: Little known fact, “Straight Quotes” are actually not quotes at all, but a notation of feet and inches. Most programs autocorrect “Smart Quotes” in place of them, but this can create a lot of issues. The easiest way is to sidestep using smart quotes is to turn them off. Use shortcut key Ctrl + K to open Preferences and navigate to “Type.” You’ll find an option there to turn off Smart Quote autocorrect.


You Are Constantly Resizing Your Windows After Zoom


The Problem: You end up zooming in and out of your image. When you zoom in, your window remains the same small size as when you were zoomed out, and you have to constantly resize it.


The Solution: Preferences has an option to curb that problem, as well. Bring them up with shortcut key Ctrl + K and look under the “General” tab. You’ll see the option for “Zoom Resizes Windows,” which will automatically resize your windows when you zoom into an image file.


The Scratch Disk Is Full?


The Problem: Photoshop runs worse than ever, and that system drive is looking really full. When you go to perform big actions and filters, it gives you an error—something about scratch disks?


The Solution: Press a simple shortcut key Ctrl + K to open preferences, then navigate to “Performance.” You have options on Scratch Disks to enable, and can add any of your free drives for Photoshop to use as extra scratch disks.
It also can’t hurt to clear up space with a Disk Cleanup. Go to your Start Menu, and find “Disk Cleanup” to help clear up some space on your system disk.


Photoshop Runs Slow on Underpowered Machines


The Problem: Waiting forever for those filters to run? Perhaps just basic commands are taking forever? Photoshop runs like a dog on your computer—is there anything you can do?


The Solution: The obvious answer is to upgrade your machine, in particular to add RAM. However, a new PC or components are not always an option for PC users. So simply navigate to your Preferences with shortcut key Ctrl + K. Under “Performance” you’ll find a submenu that allows you to give Photoshop more resources, up to 100% of the available RAM. The more the better, although take note of the “Ideal Range”, unless you don’t plan on running any other programs along with Photoshop.
And when all else fails, it can’t hurt to turn it on and off again.


Continued,,,,,,
__________________
PUTIN TRUMP & Netanyahu Will Meet in HELL


..................SHARKS are Closing in on TRUMP..........................


TRUMP WARNS; 'There'll Be a Bloodbath If I Don't Get Elected'..MAGA - MyAssGotArrested...IT's COMING


PLEASE HELP THIS SITE..Click DONATE
& Thanks to ALL Members of ... 1..

THIS SITE IS MORE THAN JUST WAREZ...& TO STOP SPAM-IF YOU WANT TO POST, YOUR FIRST POST MUST BE IN WELCOMES
Ladybbird is online now  
Digg this Post!Add Post to del.icio.usBookmark Post in TechnoratiTweet this Post!
The Following User Says Thank You to Ladybbird For This Useful Post:
FreaknDavid (25-11-11)
Old 25-11-11, 22:59   #11
 
FreaknDavid's Avatar
 
Join Date: Mar 2011
Location: In The Hills of Tennessee
Posts: 6,631
Thanks: 7,332
Thanked 7,261 Times in 4,751 Posts
FreaknDavid has a reputation beyond reputeFreaknDavid has a reputation beyond reputeFreaknDavid has a reputation beyond reputeFreaknDavid has a reputation beyond reputeFreaknDavid has a reputation beyond reputeFreaknDavid has a reputation beyond reputeFreaknDavid has a reputation beyond reputeFreaknDavid has a reputation beyond reputeFreaknDavid has a reputation beyond reputeFreaknDavid has a reputation beyond reputeFreaknDavid has a reputation beyond repute

Awards Showcase
Gold Medal Gold Medal Gold Medal Gold Medal 
Total Awards: 5

Default Re: 30 Great Photoshop Tips and Tricks to Help You

Wow--Very nice post--Thx Ladybbird.
__________________
Rock Out With DreamTeamDownloads1-The Best Place To Be For Downloads.

You Can Help the site If You Donate, Please Click Here: DONATE

Thank You For Your Support & Membership To DTD1.


FreaknDavid is offline  
Digg this Post!Add Post to del.icio.usBookmark Post in TechnoratiTweet this Post!
The Following User Says Thank You to FreaknDavid For This Useful Post:
Ladybbird (25-11-11)
Old 25-11-11, 23:10   #12
 
Ladybbird's Avatar
 
Join Date: Feb 2011
Posts: 47,595
Thanks: 27,633
Thanked 14,458 Times in 10,262 Posts
Ladybbird has a reputation beyond reputeLadybbird has a reputation beyond reputeLadybbird has a reputation beyond reputeLadybbird has a reputation beyond reputeLadybbird has a reputation beyond reputeLadybbird has a reputation beyond reputeLadybbird has a reputation beyond reputeLadybbird has a reputation beyond reputeLadybbird has a reputation beyond reputeLadybbird has a reputation beyond reputeLadybbird has a reputation beyond repute

Awards Showcase
Best Admin Best Admin Gold Medal Gold Medal 
Total Awards: 8

Default Re: 30 Great Photoshop Tips and Tricks to Help You

Remove Backgrounds Automatically with a Free Photoshop Action

Geek Eric G Goodnight


Photoshop actions are recordable programs you can create and save without any knowledge of programming. There are many ways to isolate an object in an image or remove a background in Photoshop. The following article shows you a very easy, one-button method using an action file you can download.


There are hundreds of ways to isolate an object or remove a background in Photoshop, and this is one of the absolute easiest. See how a quick download and some simple techniques can help you cut out images with ease.
Photoshop actions, as we’ve covered before, are recordable programs users can create and save without even any knowledge of programming. The bottom line is they can do some incredible things in seconds, and automatically removing backgrounds is now one of them. Keep reading to see how to remove a background by pressing one button.


Download the Photoshop Action “Transparent Channels”


Visit the author’s website, and grab the action from the “Downloads” page. The action is named “Transparent Channels” and is the first download on a very short list of downloads.


Note: Keep in mind, the downloads page is SFW, but other pages may be NSFW. Surf with care!
Install the Transparent Channels Action in Photoshop


Removing Light Backgrounds with Transparent Channels


The Transparent Channels action works by digging around in the color channels and grabbing only the image information out of your picture. You’ll want to start with images sort of like the ones above, ideally isolated on white fields like this. It is not necessary to work perfectly, but you can expect it to work best in images where you want to lighter colors to become transparent.


To remove light colored backgrounds navigate to Image > Mode and select CMYK Color. There are two actions, and they only work in a specific color mode.


CMYK > Trans Layer will remove light colored information from your image, even if you have multiple layers, so don’t worry about flattening your image.


Select


Press “Play selection” in the Actions Panel to start the action, and stand back! It’s seriously that easy.


Not every image is created equal to be cut out with this technique. Darker images on lighter backgrounds are what it likes best.


This image, while not exciting, is a good candidate for the action. It is cut out nearly flawlessly in mere seconds.


Shadows are cut out as well, which would have been an absolute nightmare to work around with methods using the paint bucket, eraser, or pen tool. Shadows blend to transparency, rather than to gray, the way they should. Even if you don’t like the results of the other parts of the action, cutting out the shadows this way can be helpful, even to the most seasoned Photoshop user.


Some lighter colored images can be run through the action multiple times, creating stacked “transparent layers” that increase the opacity of the more translucent areas. Search for images that will work well and combine the action with what you already know to create your perfect solution.


Artists will find this action is an excellent way to remove line drawings from white pages, among many, many other clever uses.

Removing Dark Backgrounds with Transparent Channels


There are two actions included in the set, and the second one is good for removing light information from dark backgrounds, like this galaxy.


This action only works with RGB Color mode images. If your image isn’t already in RGB, Navigate to Image > Mode > RGB Color to set it to RGB. Don’t flatten your image, as this action will work with a layered file or a flat one.


Make sure that RGB > Trans Layer is selected to remove all the dark background information out of your image.


Press “Play selection” and the action will do the rest for you.


Before…


After. All of the subtle blues blend to transparency, rather than to grays or gross colors that the paint bucket or eraser would have left.


Here’s the same image with a striped background placed behind it for emphasis. All the detail is retained, with the information placed conveniently in a separate layer for you to do with what you will.
__________________
PUTIN TRUMP & Netanyahu Will Meet in HELL


..................SHARKS are Closing in on TRUMP..........................


TRUMP WARNS; 'There'll Be a Bloodbath If I Don't Get Elected'..MAGA - MyAssGotArrested...IT's COMING


PLEASE HELP THIS SITE..Click DONATE
& Thanks to ALL Members of ... 1..

THIS SITE IS MORE THAN JUST WAREZ...& TO STOP SPAM-IF YOU WANT TO POST, YOUR FIRST POST MUST BE IN WELCOMES
Ladybbird is online now  
Digg this Post!Add Post to del.icio.usBookmark Post in TechnoratiTweet this Post!
Old 25-11-11, 23:21   #13
 
Ladybbird's Avatar
 
Join Date: Feb 2011
Posts: 47,595
Thanks: 27,633
Thanked 14,458 Times in 10,262 Posts
Ladybbird has a reputation beyond reputeLadybbird has a reputation beyond reputeLadybbird has a reputation beyond reputeLadybbird has a reputation beyond reputeLadybbird has a reputation beyond reputeLadybbird has a reputation beyond reputeLadybbird has a reputation beyond reputeLadybbird has a reputation beyond reputeLadybbird has a reputation beyond reputeLadybbird has a reputation beyond reputeLadybbird has a reputation beyond repute

Awards Showcase
Best Admin Best Admin Gold Medal Gold Medal 
Total Awards: 8

Default Re: 30 Great Photoshop Tips and Tricks to Help You

How to Make Hundreds of Complex Photo Edits in Seconds With Photoshop Actions

Geek Eric Z Goodnight


The previous tip provided you with a ready-made, downloadable Action file for removing backgrounds automatically. You can create Photoshop Actions to perform just about any task very quickly and easily. Do you need to make tweaks to a large number of images? The following article shows you to use Photoshop Actions to perform some complicated tweaks to many images at one time automatically.


Have a huge folder of images needing tweaks? A few hundred adjustments may seem like a big, time consuming job—but read one to see how Photoshop can do repetitive tasks automatically, even if you don’t know how to program!
Photoshop Actions are a simple way to program simple routines in Photoshop, and are a great time saver, allowing you to re-perform tasks over and over, saving you minutes or hours, depending on the job you have to work on. See how any bunch of images and even some fairly complicated photo tweaking can be done automatically to even hundreds of images at once.


When Can I use Photoshop Actions?


Photoshop actions are a way of recording the tools, menus, and keys pressed while using the program. Each time you use a tool, adjust a color, or use the brush, it can be recorded and played back over any file Photoshop can open. While it isn’t perfect and can get very confused if not set up correctly, it can automate editing hundreds of images, saving you hours and hours if you have big jobs with complex edits.


The image illustrated above is a template for a polaroid-style picture frame. If you had several hundred images, it would actually be a simple matter to use Photoshop Actions to create hundreds of new images inside the frame in almost no time at all.


Let’s take a look at how a simple folder of images and some Image editing automation can turn lots of work into a simple and easy job.


Creating a New Action
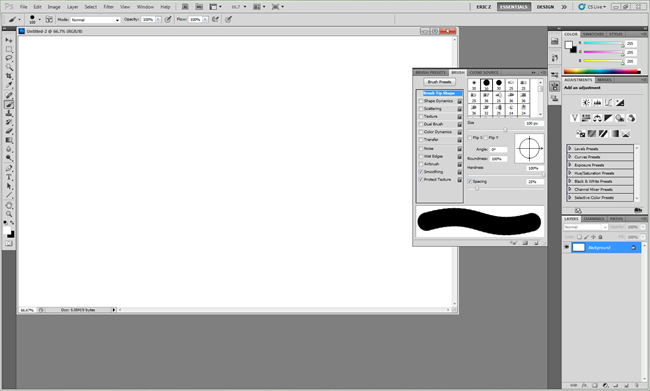


Actions is a default part of the “Essentials” panel set Photoshop begins with as a default. If you can’t see the panel button under the “History” button, you can find Actions by going to Window > Actions or pressing Alt + F9.


Click the
in the Actions Panel, pictured in the previous illustration on the left. Choose to create a “New Set” in order to begin creating your own custom Actions.


Name your action set whatever you want. Names are not relevant, you’ll simply want to make it obvious that you have created it. Click OK.


Look back in the layers panel. You’ll see your new Set of actions has been added to the list. Click it to highlight it before going on.


Click the
again to create a “New Action” in your new set.


If you care to name your action, go ahead. Name it after whatever it is you’re hoping to do—change the canvas size, tint all your pictures blue, send your image to the printer in high quality, or run multiple filters on images. The name is for your own usage, so do what suits you best.


Note that you can simplify your process by creating shortcut keys for your actions. If you plan to do hundreds of edits with your actions, this might be a good idea. If you plan to record an action to use every time you use Photoshop, this might even be an invaluable step.


When you create a new Action, Photoshop automatically begins recording everything you do. It does not record the time in between steps, but rather only the data from each step. So take your time when recording and make sure you create your actions the way you want them.


The square button stops recording, and the circle button starts recording again. With these basics ready, we can take a look at a sample Action.


Recording a Sample Action


Photoshop will remember everything you input into it when it is recording, even specific photographs you open. So begin recording your action when your first photo is already open.


Once your first image is open, click the record button. If you’re already recording, continue on.


Using the File > Place command to insert the polaroid image can be easier for Actions to deal with. Photoshop can record with multiple open files, but it often gets confused when you try it. Keep your recordings as simple as possible to ensure your success.


When the image is placed in, simply press enter to render it.


Select your background layer in your layers panel. Your recording should be following along with no trouble. Double click this layer.


Double clicking your background layer will create a new layer from it. Allow it to be renamed “Layer 0” and press OK.


Move the “polaroid” layer to the bottom by selecting it and dragging it down below “Layer 0” in the layers panel.


Right click “Layer 0” and select “Create Clipping Mask.”


The JPG image is cropped to the layer below it. Coincidentally, all actions described here are being recorded perfectly, and are reproducible. Cursor actions, like the eraser, brush, or bucket fill don’t record well, because the computer uses your mouse movements and coordinates, which may need to change from photo to photo.


Click the
to set your Photograph layer to a “Screen” blending mode. This will make the image disappear when it runs over the white parts of the polaroid image.


With your image layer (Layer 0) still selected, navigate to Edit > Transform > Scale. You can use the mouse to resize your Layer 0, but Actions work better with absolute numbers. Visit the Width and Height adjustments in the top options panel. Click the chain icon to link them together, and adjust them numerically. Depending on your needs, you may need to use more or less than 30%.


Your image will resize to your specifications. Press enter to render, or click the check box in the top right of your application.


+ Click on your bottom layer, or “polaroid” in this case. This creates a selection of the bottom layer.


Navigate to Image > Crop in order to crop down to your bottom layer selection


Your image is now resized to your bottommost layer, and Photoshop is still recording to that effect.


For additional effect, we can navigate to Image > Image Rotation > Arbitrary to rotate our image by a small tilt.


Choosing 3 degrees clockwise , we click OK to render our choice.


Our image is rotated, and this step is recorded.


Photoshop will even record when you save your files. With your recording still going, find File > Save As.


You can easily tell Photoshop to save in a new folder, other than the one you have been working in, so that your files aren’t overwritten.


Navigate to any folder you wish, but do not change the filename. If you change the filename, Photoshop will record that name, and save all your images under whatever you type.


However, you can change your filetype without recording an absolute filename. Use the pulldown tab and select a different filetype—in this instance, PNG.


Simply click “Save” to create a new PNG based on your actions. Photoshop will record the destination and the change in filetype. If you didn’t edit the name of your file, it will always use the variable filename of any image you open. (This is very important if you want to edit hundreds of images at once!)


Click File > Close or the red “X” in the corner to close your filetype. Photoshop can record that as well.


Since we have already saved our image as a JPG, click “NO” to not overwrite your original image. Photoshop will also record your choice of “NO” for subsequent images.


In your Actions panel, click the stop button to complete your action. You can always click the record button to add more steps later, if you want.


This is how your new action looks with its steps expanded. Curious how to put it into effect? Read on to see how simple it is to use that recording you just made.


Editing Lots of Images with Your New Action


Open a large number of images—as many as you care to work with. Your action should work immediately with every image on screen, although you may have to test and re-record, depending on how you did. Actions don’t require any programming knowledge, but often can get confused or work in a counter-intuitive way. Record your action until it is perfect. If it works once without errors, it’s likely to work again and again!


Find the “Play” button in your Actions Panel. With your custom action selected, click “Play” and your routine will edit, save, and close each file for you. Keep bashing “Play” for each open file, and it will keep saving and creating new files until you run out of work you need to do.


And in mere moments, a complicated stack of work is done. Photoshop actions can be very complicated, far beyond what is illustrated here, and can even be combined with scripts and other actions, creating automated creation of potentially very complex files, or applying filters to an entire portfolio of digital photos.

Image Credits: All images copyright Stephanie Pragnell and author Eric Z Goodnight, protected under Creative Commons.


__________________
PUTIN TRUMP & Netanyahu Will Meet in HELL


..................SHARKS are Closing in on TRUMP..........................


TRUMP WARNS; 'There'll Be a Bloodbath If I Don't Get Elected'..MAGA - MyAssGotArrested...IT's COMING


PLEASE HELP THIS SITE..Click DONATE
& Thanks to ALL Members of ... 1..

THIS SITE IS MORE THAN JUST WAREZ...& TO STOP SPAM-IF YOU WANT TO POST, YOUR FIRST POST MUST BE IN WELCOMES
Ladybbird is online now  
Digg this Post!Add Post to del.icio.usBookmark Post in TechnoratiTweet this Post!
Old 25-11-11, 23:35   #14
 
Ladybbird's Avatar
 
Join Date: Feb 2011
Posts: 47,595
Thanks: 27,633
Thanked 14,458 Times in 10,262 Posts
Ladybbird has a reputation beyond reputeLadybbird has a reputation beyond reputeLadybbird has a reputation beyond reputeLadybbird has a reputation beyond reputeLadybbird has a reputation beyond reputeLadybbird has a reputation beyond reputeLadybbird has a reputation beyond reputeLadybbird has a reputation beyond reputeLadybbird has a reputation beyond reputeLadybbird has a reputation beyond reputeLadybbird has a reputation beyond repute

Awards Showcase
Best Admin Best Admin Gold Medal Gold Medal 
Total Awards: 8

Default Re: 30 Great Photoshop Tips and Tricks to Help You

How to Save, Share, Download, and Install Custom Photoshop Actions


We’ve shown you how to tweak many images at once using Photoshop Actions and provided you with a downloadable Action file for removing backgrounds automatically. You can export Actions you create to share or archive, and even download actions you find on the internet. However, exporting, sharing, and installing downloaded actions can be confusing. The following article provides simple instructions on how to do all three.


Photoshop Actions, you may remember, allow users to do record and replay complex tasks with no programming skill. But exporting, sharing, and installing downloaded actions can be confusing. Here’s simple instructions on how you can do all three.


Now we’ll show you how to install any you might have downloaded, as well as export your own in order to upload, archive, or share. Keep reading!


Download and Use Photoshop Actions


Assuming you’ve got a Photoshop action you want to install, open Photoshop and navigate to Window > Actions to open the Actions Panel. If you don’t have one to test, you can find one on the author’s site, here, or use this link as a direct download. You can also try some basic Google Searches for Photoshop actions; you’re likely to find some very excellent and useful ones with very little searching.


Once you’ve opened the Actions Panel (Window > Actions), click the
to open the contextual menu. Find Load Actions from this menu and click it.


You’re given a simple load dialog. Find where your downloaded action is and click “Load.”


You can save your downloaded actions in your default Photoshop folder, which is usually in C:\Program Files\Adobe\Adobe Photoshop\Presets\Actions. Another helpful place is in your Dropbox folder, if you happen to use Dropbox for file sharing. This will allow you to install your downloaded and saved actions on cross platform installations of Photoshop.


Loading your downloaded Actions couldn’t be simpler, so get busy downloading some, and putting them to good use!


Export and Share Your Custom Photoshop Actions


If you’ve already done some basic legwork and made your own custom actions, you’re probably ready to export them into action files other people can use—or maybe you just want to use them yourself on other computers with Photoshop. It’s quite easy.


Photoshop can only save sets of actions, rather than single actions alone. Click the “New Set” icon pictured above to create a new set.


Title the new set the same as your existing action or actions, or name it anything memorable.


Then simply drag your action into your new set.


With your new set selected, click the
at the top of the actions panel. The contextual menu will have an option for “Save Actions.”


And there you have it, simply save your file into the proper place, like your desktop, Dropbox, or default actions folder. From there, you can upload and share your actions file like any other basic file that Photoshop can open.
Image Credits: Red Eyed Tree Frog by Carey James Balboa.


You can find lots more good Photoshop tips in this How To Computer Help Section.
It took me a very long time putting all these different tips/help together for you members, so either a posted THANKS or click the thanks button on my posts. That would be nice, as many dont bother!

Ladybbird
.
__________________
PUTIN TRUMP & Netanyahu Will Meet in HELL


..................SHARKS are Closing in on TRUMP..........................


TRUMP WARNS; 'There'll Be a Bloodbath If I Don't Get Elected'..MAGA - MyAssGotArrested...IT's COMING


PLEASE HELP THIS SITE..Click DONATE
& Thanks to ALL Members of ... 1..

THIS SITE IS MORE THAN JUST WAREZ...& TO STOP SPAM-IF YOU WANT TO POST, YOUR FIRST POST MUST BE IN WELCOMES
Ladybbird is online now  
Digg this Post!Add Post to del.icio.usBookmark Post in TechnoratiTweet this Post!
Post New ThreadClosed Thread


Currently Active Users Viewing This Thread: 1 (0 members and 1 guests)
 

Posting Rules
You may not post new threads
You may not post replies
You may not post attachments
You may not edit your posts

BB code is On
Smilies are On
[IMG] code is On
HTML code is Off
Trackbacks are On
Pingbacks are On
Refbacks are On


Powered by vBulletin® Version 3.8.11
Copyright ©2000 - 2024, vBulletin Solutions Inc.
SEO by vBSEO 3.5.2
Designed by: vBSkinworks