For Christmas Card creating fun and a great way to use your new fonts see our Microsoft Word Christmas Card project series here.
Design and Print Your Own Christmas Cards on MS Word, Part 1
 Looking for a little DIY fun this Special Season? Open up familiar tool MS Word and create simple, beautiful Christmas cards, and impress your family with your crafting skills.
This is the first part of a two part article. In this first section, well tackle design in MS Word. In our second, well cover supplies and proper printing methods to get a great look out of your dusty old inkjet.
Go Beyond Microsoft Clipart!
Looking for a little DIY fun this Special Season? Open up familiar tool MS Word and create simple, beautiful Christmas cards, and impress your family with your crafting skills.
This is the first part of a two part article. In this first section, well tackle design in MS Word. In our second, well cover supplies and proper printing methods to get a great look out of your dusty old inkjet.
Go Beyond Microsoft Clipart!

One of the common mistakes of designing in Word is looking in the Clipart menu for graphics. While this can sometimes work, word will allow you to use many kinds of graphics as part of your artwork.
One great resource for great images is the Flickr Creative Commons. By doing an Advanced Search, you can search through hundreds of user photos narrowed by license.

Go to the search on Flickr.com and choose the Advanced search, or simply visit this link to go directly there.

Use any search criteria you like. Christmas as a search term worked wonders for me. Simply ensure you have Creative-Commons content checked in the illustrated part of the menu. Support Free Culture!

Another good resource is DoverPublications.com, a company that sells edited
collections of public domain graphics and illustrations as clipart. They have an email newsletter with free content, often appropriate for these sorts of DIY projects.


While not all of the art is useful, it is surprising how high quality some of it is. Dover books are often very cheap, and other than the annoyance of putting up with their newsletter, their clipart samplers are free.
Designing the Card in Word

The initial step is to create a Landscape- oriented document thatll print us a Half-Fold card on a regular 8.5 x 11 piece of paper. You can do this by going to Page Layout and adjusting the margins, setting a large margin on your left side to accommodate a left folding card. You can either create this yourself, or simply download this How-To Geek Template and save yourself the effort.

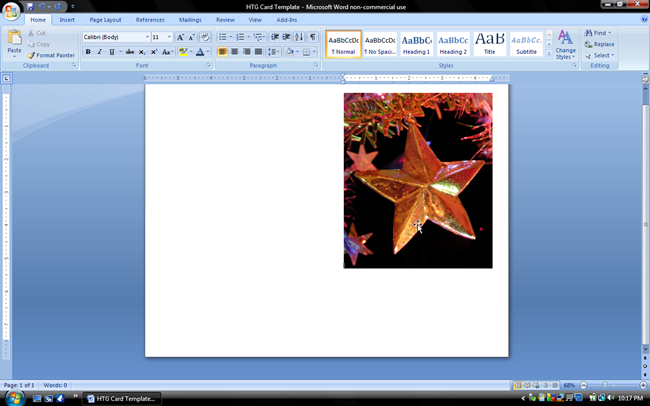
Our First task is to add some of our photographs and clipart pics. Navigate to Insert > Picture as illustrated above.

Pick the image that suits you best. Youll have a lot more quality images to pick from if you use high quality images from Flickr or other sources, rather than clipart.
Your image is added and automatically resized to fit your margins, but lets add some treatments to make our card look more full and rich.

Select the image with your mouse, then navigate to the area of your ribbon called Picture Tools.

Picture tools should look something similar to this illustration.

Youll see an area marked Picture Styles. Click the drop-down tab, and pick one that suits you and your image. Soft Edge Rectangle, shown here, seems a good choice for a warm, fuzzy Christmas card.

When youre done, use your arrow keys to move your cursor to the top of your image and begin typing the message you want your card to say.

Default font Calibri is not a terribly festive typeface, so use your mouse to select your text and navigate to Home to change the font.

The font pictured above is
Vivaldi. Use whatever fonts you have or want to take the time to install.

The greeting in the font seemed too bold and out of place compared to the rest of our card front. By shrinking the point size in the home menu, we can see it becomes less gaudy and more understated.


will create a page break to continue to the inside of your Christmas Card, or simply scroll down to the new page.

Word will use your last font by default. Keep in mind, it may not be the one you want to use!

Using various point sizes, small and large, can add emphasis to some words over others. You can edit point sizes on the Home menu of your ribbon.

Navigate to Insert > Picture if you care to add another image to the inside of your card.

Returning to Picture Tools, you can select a handsome Picture Style for your inside art.

The above is Reflected Rounded Rectangle.

Adding some simple text below the image rounds the design out simply and nicely. You may need to shrink and blow up your pictures and lines of text in order to ensure everything you want fits onto your card front and inside. It may be frustrating, but a little DIY Holiday Cheer will prove to be worth it, in the end.
Eric Goodnight
Continued with Part 2 of the MS Word Christmas Card project, where we show how to use nice paper stock and clever printing to turn your MS Word Masterpiece into a card that is sure to impress your whole family.
Image Credits: Christmas Star by brockvicky, released under Creative Commons. Christmas Time by *L*u*z*A*, released under Creative Commons. Dover Clipart assumed fair use.